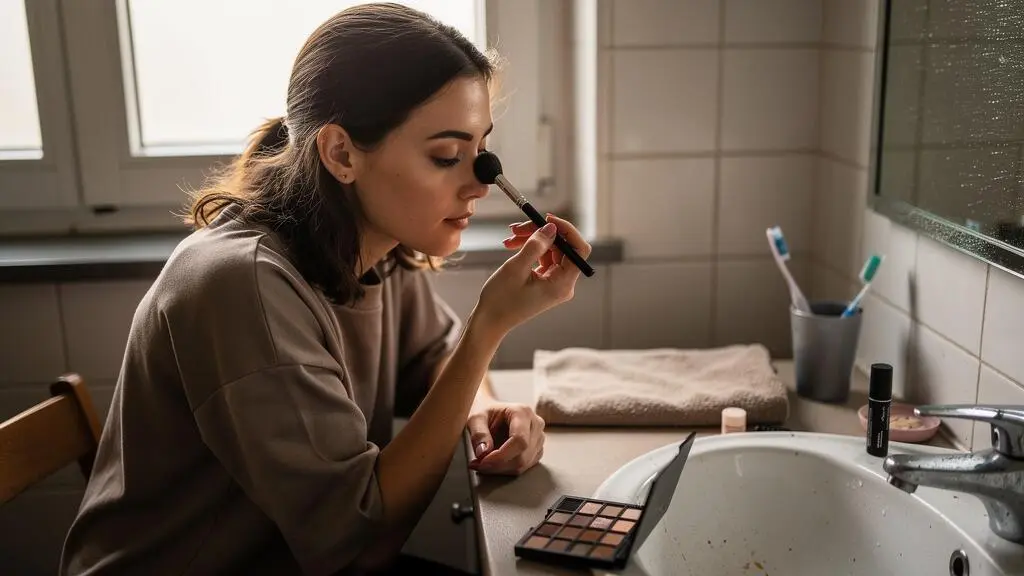
If you only buy one specialised eyeshadow blending brush in Belgium, choose a small-to-medium, softly tapered synthetic brush with enough flexibility to diffuse colour and enough firmness to control placement. For many everyday eye looks, this balanced shape is more useful than either an oversized fluffy brush or a tightly packed detail brush.
The right purchase depends on three things: how much visible eyelid space you have, how strongly your eyeshadows deposit pigment, and whether your current brush blends colour or simply moves it around. A brush that works beautifully on a large eyelid can make a hooded eye look muddy, even when the technique is correct.
Belgian shoppers can compare brush shapes through beauty retailers such as Di, Kruidvat and ICI PARIS XL, but should not assume that a higher price guarantees a better result. Understanding head size, density and fibre softness makes it easier to buy one useful tool instead of a collection of brushes that perform nearly identical jobs.
The one-brush buying decision
- Best all-round shape: a small-to-medium tapered synthetic blending brush with soft, moderately flexible bristles.
- Most important adjustment: choose a smaller head for hooded or limited lid space and a slightly firmer head when controlled pigment placement matters.
- Best way to avoid unnecessary purchases: test your current brush, remove pigment between shades and clean it regularly before replacing it.
- Why Does Eyeshadow Refuse to Blend Even When You Watch Tutorials?
- How to Choose a Blending Brush Shape for Hooded Eyes Without Guessing?
- Fluffy or Dense Blending Brush: Which Works Better With Highly Pigmented Shadows?
- The Dirty-Blending-Brush Mistake That Creates Random Dark Patches
- When Should You Replace a Blending Brush if It Starts Feeling Scratchy on the Lid?
- How to Blend Eyeshadow Using One Clean Brush Step So You Keep Contrast?
- Synthetic or Natural Hair Brush: Which Blends Better Without Irritating Sensitive Skin?
- Are Synthetic Fiber Makeup Brushes Better for Hygiene and Allergies in Belgium?
Why Does Eyeshadow Refuse to Blend Even When You Watch Tutorials?
Eyeshadow often refuses to blend because the brush deposits too much colour, covers too much eyelid or carries leftover pigment. Technique matters, but repeating a tutorial’s movements will not produce the same effect if your brush has a different shape or density. Before buying another palette, check whether your tool can actually soften an edge.
A general-purpose eyeshadow brush is often designed to pick up and place colour. Its compact bristles may be useful for packing shadow onto the mobile lid, but less effective for gradually diffusing a darker shade into a transition colour.
When you move a densely loaded brush back and forth, you can distribute more pigment along the crease instead of creating a soft gradient. Pressing harder rarely solves that problem. It may simply shift the shadow into an area where you did not intend it to go.
The distinction is visible in specialised designs. According to Sigma Beauty’s E25 Blending Brush specifications, the E25 combines a slightly firm, rounded synthetic head with a flattened ferrule. Its intended use includes placing eyeshadow and softening harsh lines with the brush tip. This illustrates how head geometry can support different application movements, although it does not prove that the E25 outperforms other models.
Try this three-part diagnostic with your existing brush:
- Apply a small amount of transition eyeshadow to the crease with light pressure.
- Use short blending movements and observe whether the outer edge becomes softer or noticeably darker.
- Repeat with less product on a clean brush. If the edge still spreads too widely, consider whether the brush head is too large or too dense for your eyelid.
Also consider the eyeshadow itself. A firmly pressed powder, a very creamy formula and a loose, powdery shadow can behave differently on the same brush. A brush purchase cannot correct every formula-related problem.
Tutorials can create unrealistic comparisons when their brush shapes, application pressure, lighting and products differ from yours. There is no reliable basis for assuming that every tutorial uses less-pigmented shadows than those available at Belgian retailers.
If the problem persists with a clean brush and a light amount of product, the next useful question is whether the brush actually fits the space available on your eyelid.
How to Choose a Blending Brush Shape for Hooded Eyes Without Guessing?
For hooded eyes, a small tapered blending brush is usually a practical first choice because it keeps colour within a limited transition area. The correct head should fit the visible space above the mobile lid without spreading pigment unintentionally toward the lash line or brow. Judge its size against your eye rather than the brand’s brush number.
Hooded eyelids do not all have the same shape. Some have a visible crease when the eye is open, while others have very little transition space. The amount of room available matters more than whether a brush is marketed as suitable for hooded eyes.
Three common brush shapes serve different purposes:
| Brush shape | Useful for | Main limitation |
|---|---|---|
| Rounded fluffy | Soft, broad transitions on eyelids with sufficient space | Can spread colour too far on smaller or heavily hooded lids |
| Small tapered | Controlled crease blending and gradual diffusion | Requires more careful movement when blending a large area |
| Dense flat | Placing concentrated shadow on the lid or outer corner | May leave hard edges when used as the only blending tool |
A small tapered head offers a useful compromise: the pointed or narrowed tip can guide placement, while the softer sides can diffuse the transition. You still need to check whether the bristles flex comfortably rather than behaving like a stiff pencil.
In a Belgian beauty shop, ask whether you can inspect or try a clean tester. Press the brush head gently against the back of your hand to see its shape and how widely the bristles spread. Then compare that working width with your visible mobile eyelid.
This is a practical sizing test, not a scientifically established measurement standard. A brush that appears smaller than your mobile lid is a sensible candidate, but its actual behaviour also depends on pressure and the flexibility of the fibres.
With limited crease space, apply shadow while looking straight into a mirror. This makes it easier to identify where the colour remains visible with the eye open. A smaller brush can then soften the boundary without removing the distinction between the mobile lid and the outer corner.
Your five-step in-store brush checklist
- Check your lid space: look straight ahead in a mirror and identify the area where you want the transition colour to remain visible.
- Choose a head size: compare the working width of a clean tester with that area and identify a brush that fits comfortably.
- Test flexibility: gently press the bristles against the back of your hand and confirm that they bend without feeling rigid.
- Inspect the shape: select a tapered or softly rounded head that supports both placement and gentle edge blending.
- Confirm the purchase: check fibre composition, final price and cleaning instructions, then record one model that meets all three requirements.
Once the head fits your eyelid, density becomes the next important decision, particularly if your favourite shadows deliver intense colour with very little product.
Fluffy or Dense Blending Brush: Which Works Better With Highly Pigmented Shadows?
A soft fluffy brush usually makes highly pigmented eyeshadow easier to diffuse, while a denser brush offers more precise placement and potentially stronger colour transfer. Neither is universally better. For a single purchase, a moderately fluffy, slightly tapered brush often provides the most useful balance between soft transitions and controlled application.
Fluffy and dense brushes interact with pigment differently because their bristles distribute pressure and product across different areas.
A loosely packed head tends to spread contact across a wider surface. This can help produce gradual transitions, particularly when you begin with very little shadow. A tightly packed head generally offers more concentrated contact, which is useful for placing colour but can make it easier to establish a harsh boundary.
For strongly pigmented palettes from accessible beauty brands such as Essence, Catrice or Makeup Revolution, start with a nearly unloaded brush. These brands offer different formulas, so the brand name alone cannot establish how any particular shade will blend.
For a softer or less pigmented powder, a slightly firmer brush may make application more efficient. Otherwise, a very airy brush can require repeated loading and repeated passes, increasing the chance that the colour spreads outside your intended shape.
The important distinction is between a fluffy head that diffuses colour predictably and one so large or flexible that you lose control over the placement.
Imagine two hypothetical applications:
- Highly pigmented dark brown: use minimal product and small movements with a soft tapered head, keeping most of the colour near the outer crease.
- Sheer neutral transition shade: use a slightly firmer part of the same brush head to build colour, then blend with lighter pressure and the softer tip.
For someone purchasing only one brush, a balanced head is generally more adaptable than either extreme. It should flex enough to soften a boundary while retaining sufficient shape to avoid sweeping colour across the entire eyelid.
Be cautious about assuming that softer always means easier. Repeatedly blending with an almost empty, oversized brush can enlarge the coloured area without improving the gradient. A smaller movement and a deliberate amount of product may be more effective than additional passes.
Even a well-chosen brush can produce unexpectedly muddy results when residual pigment from previous applications remains in its fibres.
The Dirty-Blending-Brush Mistake That Creates Random Dark Patches
A dirty blending brush can create unexpected dark patches because pigment left between its bristles may transfer during the next blending step. This is particularly noticeable when switching from a dark outer-corner shade to a light transition colour. Removing loose pigment between shades helps, but it does not replace regular washing.
Picture a typical makeup routine: you blend dark brown at the outer corner, then use the same brush to soften a pale beige transition. The brush still contains some brown pigment, which can transfer into the lighter area even though you have not deliberately picked up more shadow.
The result may look like poor technique or an uneven eyeshadow formula when the immediate issue is simply product carryover.
A dry wipe is a useful first response. Gently move the bristles across a clean, dry towel until visible loose pigment stops transferring. Avoid pulling or crushing the head. This can reduce colour contamination during an application, although it will not thoroughly remove oils, firmly embedded residue or microorganisms.
For thorough cleaning, the American Academy of Dermatology‘s makeup-brush cleaning recommendations advise washing brushes every seven to ten days. Its guidance includes using lukewarm water and shampoo, rinsing until the water runs clear and drying the brush horizontally.
Every 7–10 days
The American Academy of Dermatology’s recommended makeup-brush washing interval. This is general hygiene guidance, not a rule established specifically for eyeshadow-blending brushes.
American Academy of Dermatology Association
Keep water away from the handle attachment as much as possible. After rinsing the bristles, remove excess moisture carefully and let the brush dry with its head extending over the edge of a counter. Avoid storing a wet brush upright, as water can reach the adhesive that holds its components together.
If dark patches repeatedly appear in a similar location, compare applications using a freshly washed, fully dried brush. If the patches disappear, residue may have contributed. If they persist, consider product placement, the eyeshadow formula and pressure before assuming the tool is faulty.
Regular cleaning also makes it easier to assess the condition of the bristles, which matters when a brush begins to feel uncomfortable against the eyelid.
When Should You Replace a Blending Brush if It Starts Feeling Scratchy on the Lid?
Replace a blending brush when it remains rough or irritating after appropriate cleaning and complete drying, particularly if the bristles are visibly broken, misshapen or excessively stiff. A scratchy feeling does not always mean the brush is worn out: dried product and temporary changes in bristle shape can sometimes be corrected without buying another tool.
The first step is to distinguish a contaminated brush from one with damaged fibres.
Accumulated powder, cream shadow or other makeup residue can make bristles feel stiff. A gentle wash may restore their flexibility. If the head has become untidy after washing, carefully reshaping the bristles while they are damp and allowing them to dry naturally may improve their alignment.
That is different from genuinely broken fibres. Split or snapped bristles can create uneven contact with the skin and may not recover their original softness. A ferrule that loosens or a head that no longer holds its intended shape is another reason to consider replacement.
Use the inside of your wrist for a preliminary comfort check. Gently move the clean, dry brush across the skin without applying pressure. This does not reproduce the sensitivity of an eyelid, but it can reveal obvious roughness before you use the brush near your eye.
| Observed problem | First response | Replacement decision |
|---|---|---|
| Hard or sticky residue | Wash gently and dry completely | Reassess after cleaning |
| Uneven but intact bristles | Reshape carefully after washing | Replace if the head no longer works comfortably |
| Broken, rough or shedding fibres | Inspect the damage | Replace if damage or irritation persists |
| Loose ferrule or unstable head | Stop using until inspected | Replace if the assembly is insecure |
Do not continue using a brush that scratches, stings or visibly irritates the eyelid. Discomfort is more important than the amount of money already spent on the tool.
In Belgium, replacing one worn brush may be a more focused expense than buying another eyeshadow palette, but there is no universal replacement interval or fixed price threshold supported by the available evidence.
A comfortable brush in good condition can also support the most valuable blending technique for anyone trying to work with only one specialised tool.
How to Blend Eyeshadow Using One Clean Brush Step So You Keep Contrast?
The clean-brush step means softening only the outer boundaries of your finished eyeshadow placement with a clean, dry brush. Use short, light movements rather than sweeping across the entire eyelid. This preserves stronger colour in the crease or outer corner while reducing harsh edges, even when you own only one specialised blending brush.
The timing matters. Place your main colours first, establishing the light transition, crease depth and any darker outer-corner definition. Then remove loose pigment from your blending brush before working on the boundaries.
If you begin extensively blending before completing your colour placement, you may repeatedly disturb the transition while trying to rebuild contrast. It is generally more efficient to refine the gradient once the main shapes are established.
For a simple everyday look, the sequence can be:
- Apply a lighter transition colour in the area where you want the gradient.
- Build a darker shade in the crease or outer corner with controlled pressure.
- Remove loose pigment from the brush using a clean, dry towel.
- Blend the line between the two areas with short movements, concentrating on the edge rather than the centre of either colour.
- Stop once the boundary looks softer while the darker shade remains visibly distinct.
When using a single brush for both placement and diffusion, an important limitation remains: dry wiping cannot guarantee that every pigment particle has been removed. A very dark shade may continue to transfer even after several wipes.
If that happens, stop and clean the brush properly rather than forcing the transition. For practical everyday use, you can also plan the order of application so that lighter shades are handled before darker ones.
The other common error is treating blending as a task that should continue until every colour becomes indistinguishable. A successful gradient still has structure. The outer corner can remain deeper, the transition can stay softer and the mobile lid can retain its intended brightness.
For hooded eyes, check the result with your eyes open. A transition that looks smooth with the lid closed may sit differently when the natural fold covers part of the colour.
Once the technique is established, the remaining buying decision is whether synthetic or natural fibres better suit your skin, products and cleaning routine.
Synthetic or Natural Hair Brush: Which Blends Better Without Irritating Sensitive Skin?
A soft synthetic blending brush is a practical first choice for sensitive skin because suitable synthetic fibres can provide consistent performance and are commonly straightforward to clean. Natural-hair brushes can also blend powder eyeshadow effectively, but neither material guarantees freedom from irritation. Bristle finish, flexibility, manufacturing quality and maintenance matter alongside fibre composition.
The traditional distinction is that natural hair has a textured surface that can interact effectively with powder products, while many synthetic fibres are manufactured to provide a more uniform structure. Actual performance varies considerably by brush design and fibre treatment.
A high-quality natural-hair brush can feel exceptionally soft and diffuse powder evenly. However, the description “natural hair” does not establish quality. Poorly finished fibres may feel uncomfortable, and different natural hairs can have different properties.
Similarly, a synthetic brush is not automatically gentle. Stiff, poorly finished synthetic bristles may irritate the eyelid, while well-manufactured ones can offer comfortable application.
For someone choosing only one brush, synthetic fibres offer several practical advantages:
- They are commonly designed for use with powder and cream makeup, making them useful across different eyeshadow textures.
- They can be easier to maintain when paired with appropriate cleaning instructions and good construction.
- They avoid animal-hair materials, which may matter for personal preferences or suspected sensitivities.
These advantages should not be interpreted as clinical proof that all synthetic brushes retain fewer bacteria, cause fewer allergies or are safer for every sensitive-skin user. The supplied evidence does not establish those comparisons.
For cream or long-wearing eyeshadow, check whether the brush manufacturer recommends the tool for that formula. Product compatibility depends on the brush’s construction, not merely its fibre category.
Anyone with reactive eyelids should prioritise a smooth, soft head that does not tug at the skin. Avoid using the brush on visibly irritated or broken skin, and discontinue use if it causes discomfort.
For Belgian buyers, hygiene and consumer-product safety add a final layer to the decision, but neither should be confused with a guarantee of superior blending performance.
Key takeaways before choosing your brush
- Choose head size and density for your eyelid and eyeshadow formula before comparing premium finishes or brand reputation.
- A synthetic brush is a sensible all-round option, but fibre material alone does not establish allergy protection or superior hygiene.
- A manageable cleaning routine and secure brush construction matter more for long-term usefulness than owning several nearly identical blending brushes.
Are Synthetic Fiber Makeup Brushes Better for Hygiene and Allergies in Belgium?
Synthetic makeup brushes can be a practical hygiene-conscious choice in Belgium because many are easy to wash and suitable for repeated everyday use. However, there is insufficient evidence here to conclude that synthetic fibres universally prevent allergies or harbour fewer microorganisms than natural hair. Effective cleaning, thorough drying and individual skin tolerance remain essential.
Belgian consumers benefit from the European Union’s general consumer-product safety framework. EU Regulation 2023/988 on general product safety has applied since 13 December 2024 and establishes requirements for consumer products within its scope, subject to relevant product-specific legislation.
This framework does not mean that every brush sold in Belgium has undergone an independent test of its blending performance, fibre softness or allergy risk. Legal compliance should not be treated as a quality ranking.
For hygiene, what happens after washing matters. Water trapped near the ferrule can make thorough drying more difficult and may affect the adhesive or structural integrity of a brush.
The American Academy of Dermatology recommends drying makeup brushes horizontally with their tips extending over a counter edge. This helps prevent moisture from travelling toward the handle attachment. Keeping a brush upright while it is wet is not recommended.
In terms of shopping, a Belgian retailer can provide a useful local reference point. ICI PARIS XL Belgium has listed the Charlotte Tilbury Eye Blender Brush at €32, describing it as a 100% synthetic brush for applying and softening eyeshadow. This is a documented premium-price example, not proof that spending €32 produces a better result than purchasing a lower-priced brush.
For a budget-conscious buyer, the sensible approach is to compare shape, comfort, construction and intended use before comparing prices. Di, Kruidvat and ICI PARIS XL can be starting points for checking available ranges, but individual stock, prices and tester access should be verified at the time of purchase.
There is little reason to pay a premium simply for the words “synthetic” or “professional” on the packaging. A comfortable, appropriately sized brush that performs the task you need is the more meaningful purchase.
Choose one soft, moderately flexible synthetic brush that fits your lid, test it with the eyeshadows you already own and maintain it properly. Upgrade again only if a specific limitation remains visible after you have adjusted your technique and cleaning routine.
Can one blending brush handle both everyday and evening eyeshadow looks?
Yes, a well-sized tapered brush can handle transition shades, gentle crease definition and the final softening of edges. More precise or elaborate looks may benefit from additional tools, but they are not necessarily required for everyday application. The most important limitation is keeping the brush free from unwanted pigment when moving between light and dark shades.
Is an expensive blending brush worth buying as a beginner?
Not automatically. A premium brush may offer construction or finishing features you appreciate, but price alone does not establish better blending. Compare the head size, bristle flexibility, comfort and intended formula compatibility before paying more. A modestly priced brush that suits your eyelid may be the better first purchase.
Can a blending brush be used with both powder and cream eyeshadow?
Some brushes are suitable for both, particularly when the manufacturer identifies compatibility with different textures. Cream products may require more thorough cleaning because residue can remain in the fibres. Check the instructions for the specific brush rather than assuming all synthetic or natural-hair models perform identically.
Should you wash a new makeup brush before using it?
Washing a new brush before its first use is a reasonable hygiene precaution, provided you follow the manufacturer’s care instructions. Use a suitable gentle cleanser, rinse the bristles carefully and allow the brush to dry completely before applying makeup near your eyes.
How can you compare blending brushes online without testing them in person?
Look for clear photographs showing the brush head from several angles, fibre composition, head measurements where available, intended applications and cleaning instructions. Compare these details with the dimensions and shape of a brush you already own. Check the Belgian retailer’s current delivery and return terms before ordering, particularly where hygiene-related restrictions may apply.